Showing posts with label DIY. Show all posts

Monday, January 18, 2010

PB knock off candle chandelier

So, we have a large room that we've decided is a living / dining combination.  But there is only one light fixture, and it's in the middle of the room.

We had contractors give us an estimate for putting more light in, but that is going to have to wait until we have more $$$

I wanted more definition over the area, so this is what I did:


I've seen these all over candle chandeliers all over, I've seen them at Pottery Barn, Z Gallery, Restoration Hardware, Crate and Barrel, and some high end boutiques.  They always cost several hundred dollars.  As always, I thought "I could make that myself"

The problem was, while this wasn't going to cost nearly what it would in the store - it would still be expensive with all of those candles.  I mean you're still talking $4 for a small pillar candle from WALMART!  So I put my thinking cap on.

I decided to buy some glasses at Walmart.  They were $1.92 for a set of four, and I covered them in a waxy finish contact paper:  So while the candles alone would have cost at least $100, I spent only $12.   I put some tealights in the glasses, and I think they look pretty convincing as candles.


Then I got some scrap wood at Home Depot for $0.50, and covered one side in bead board wall paper. 


And painted it the same chocolate color as our cabinets


I attached (and by I, of course I mean Jarrod) moulding around the sides and put the hooks where the chains could attach


(I didn't paint the inside, because no one will see it)

I painted the trim, and then hung it by chain from the hooks we put in the ceiling:


And Ta Da!!  I put rested some of the candles on scraps of leftover trim to stagger the heights of the glasses (there are only two different sizes here)


Total Cost: $32.50
Cups: $12 (1.92 for a 4 pack at WalMart)
Contact Paper $6
Scrap wood $0.50
Trim - $7
Hardware (chain and hooks) $7

DON'T FORGET ABOUT MY PAINT COLOR PARTY AND AMAZING GIVEAWAY!!! 
I hope to see you all back here on Friday the 22nd to share all of your favorite paint colors.


<center><a href="http://frugalhomeideas.blogspot.com"><https://blogger.googleusercontent.com/img/b/R29vZ2xl/AVvXsEjQFVacW67pGrOrhcdwQH1zBHkMUFLVNOUhrDBcg96k31a_g3MbUVAbEMjOH5JNATPMC69p4xI-sAkiNrCHerdaq_pMxkA3CO6QvBdIV7uF6JCW6I7ABOppxUJyMlzU5eUYfiOX5mk7frPE/s400/small+button.jpg"/></a></center><br><br>

Go see all the other great projects over at Kimba's!!
ASPTL


Sunday, January 17, 2010

Crap to Fab Lamp


I had a $10 Walmart crappy flimsy floor lamp.  I hated it.  My husband needed the light.  I needed to make it prettier.

So, I took this lamp:


This tube that came from a bolt of fabric that I bought:


And this table runner:


And made this:


The metal pole was so skinny, and I was adding a lot of "beef" to the top of the lamp, so I need to bulk up the bottom.  I spray painted the fabric bolt and the base of the lamp so it would all match.

The fabric was a little too short, so I added a little bit of a paper towl roll, and used painters tape to hold them together:


Classy, I know.  Hey, it could have been a toilet paper roll!

I had a drum shade from a lamp that has been in a closet, so I stole it, stripped it and used it to make the shape of the lamp shade


I just cut the table runner down, and then glued the two ends together after wrapping it around the naked shade.

Total cost to me: FREE
Total cost if I didn't have all this stuff laying around: $14
Lamp $10
Table runner $4 (from Ross)

Before:


After


I'm linking this up to:

Twice Remembered
It's so Very Cheri
The Shades of Pink
Thrifty Decor Chick, Before and after party

Wednesday, January 6, 2010

Another No Sew Roman Shade

I've been posting the play by play of our last "flip" house from two years ago, but I'm going to interrupt it to play blog party!


Shanty 2 Chic is having a "I made it without my hubby" party, and I just finished this last night.

I made  one of these for my little boy's room (you can get the full tutorial here), and it was so easy I wanted to do the same for my kitchen.

This literally took me less than a hour to make with leftover fabric (from these other no sew window treatments) and the existing mini blinds.  Fast and Free, and with my hubby!


Before: (pardon the mess on the counter)


After:


Saturday, December 5, 2009

Spray Painting Blinds


I was excited to see that the girls over at Shanty2Chic were hosting a Rust-Oleum linky party, because as you know, spray paint is one of my best friends!  Seriously, is there anything that can't be made better with a few coats of spray paint?

The most dramatic change I've ever made with spray paint is when I decided to spray paint our blinds in our living room.  We were on a SUPER tight budget when remodeling the house, so spending close to $100 for new blinds in that room was OUT.  They were already sturdy and in good condition anyway - just ugly.

I was very skeptical that this would work, and googled the heck out of spray painting blinds and came up with nothing.

We hung the blinds outside on the swing set


And Jarrod commenced the spraying with Rustoleum's Espresso in a Satin Finish


Here's the Before:


and the MUCH improved with a can of spray paint after:


These were faux wood blinds, probably made out of some sorty of vinyl or plastic.  But they had a fake wood grain in them which you can still see, so these really do look like espresso stained wood blinds! 

Perfect!

Check out what others are doing with their spray paint at this party:


Shanty 2 Chic


Friday, November 27, 2009

Piece of cake

Today we celebrated my son's first birthday. I wanted to share the cake that my husband and I made. 

I have never baked anything more than a box of brownies, so I was a little intimidated about making a "cool" cake, but I'm never one to shy away from a creative challenge.

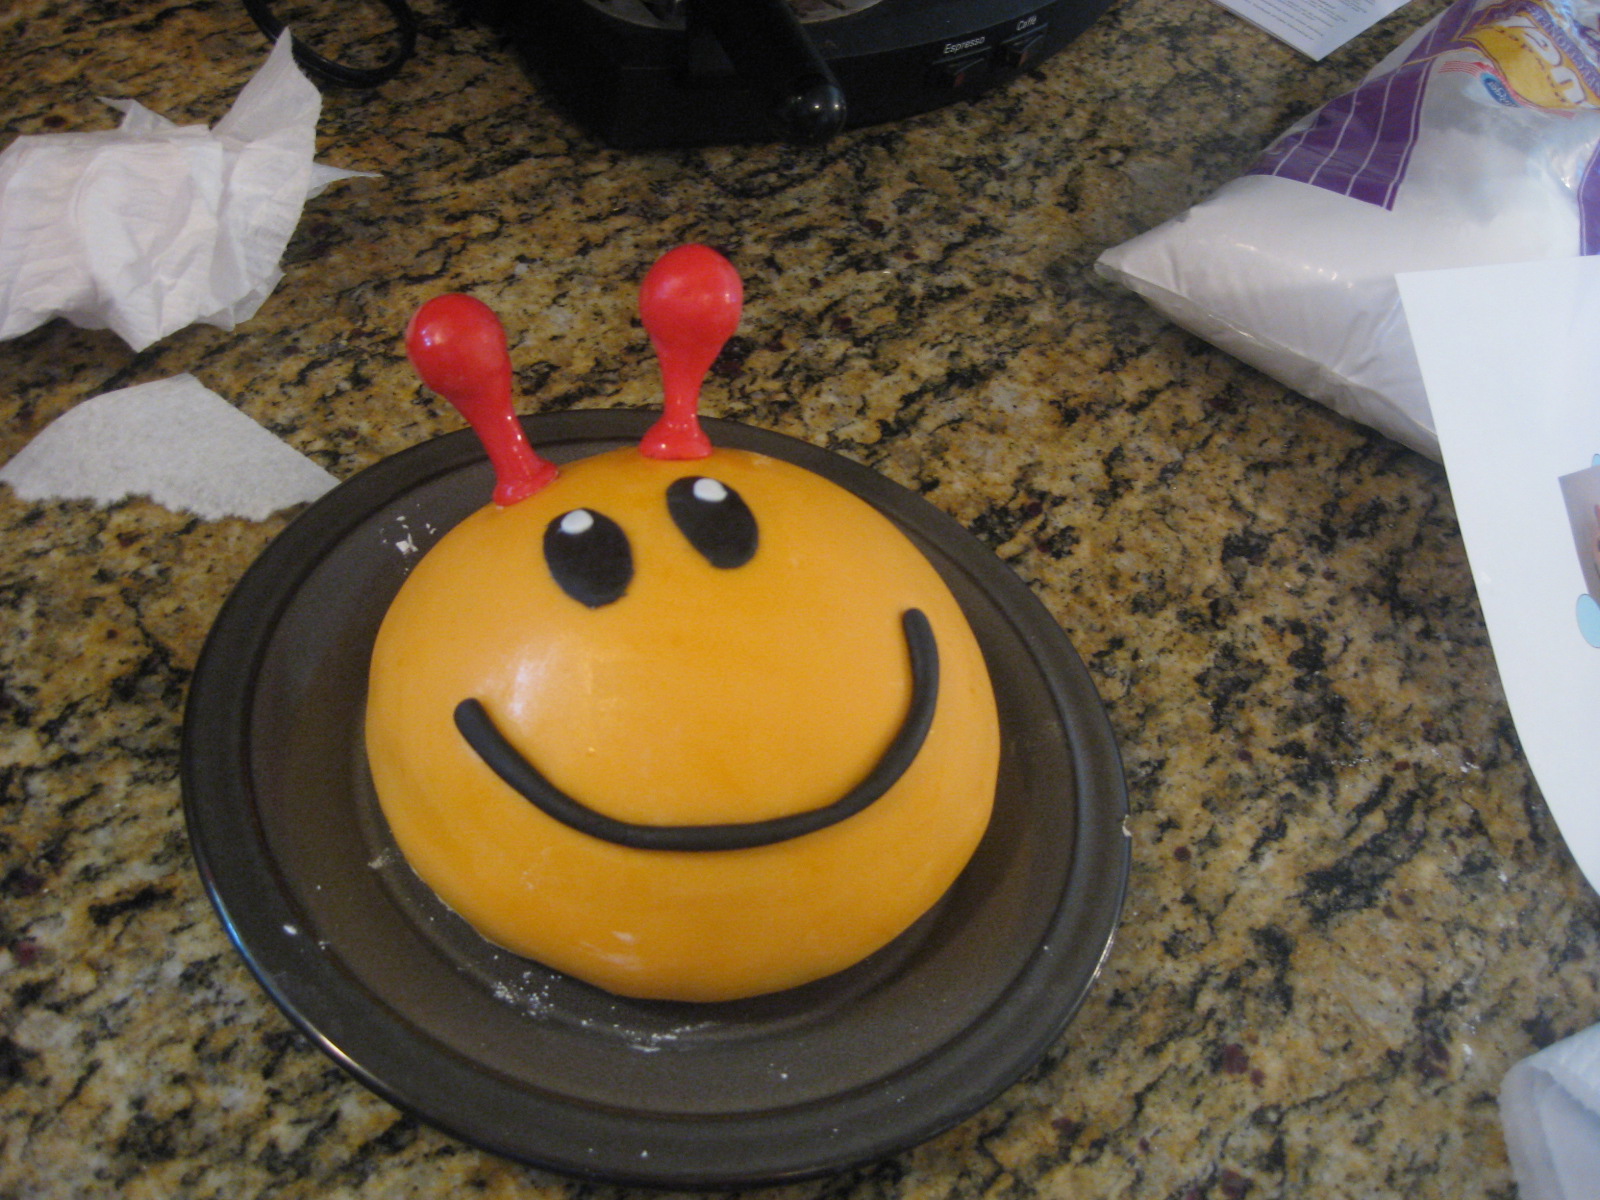
He LOVES Baby Einstein, and this catepillar comes across the screen at the beginning of each DVD.  My little guy gets SO excited, so I knew that's what we had to do for a cake.


The cake was made out of a sports ball pan.  I used the halves instead of making the full ball, and the covered it in store bought fondant that we colored with food coloring.  A LOT easier than I thought it would be!


The antennae are dum dums covered in fondant.


finishing touches:


Taste Test:


I think he approved:


He wouldn't stop eating it!  Daddy got a little scared that he would get sick so we finally tore him away from the cake.  I will absolutely be making more cakes in the future.  This was a lot of fun!


Related Posts Plugin for WordPress, Blogger...