Monday, January 18, 2010

PB knock off candle chandelier

So, we have a large room that we've decided is a living / dining combination.  But there is only one light fixture, and it's in the middle of the room.

We had contractors give us an estimate for putting more light in, but that is going to have to wait until we have more $$$

I wanted more definition over the area, so this is what I did:


I've seen these all over candle chandeliers all over, I've seen them at Pottery Barn, Z Gallery, Restoration Hardware, Crate and Barrel, and some high end boutiques.  They always cost several hundred dollars.  As always, I thought "I could make that myself"

The problem was, while this wasn't going to cost nearly what it would in the store - it would still be expensive with all of those candles.  I mean you're still talking $4 for a small pillar candle from WALMART!  So I put my thinking cap on.

I decided to buy some glasses at Walmart.  They were $1.92 for a set of four, and I covered them in a waxy finish contact paper:  So while the candles alone would have cost at least $100, I spent only $12.   I put some tealights in the glasses, and I think they look pretty convincing as candles.


Then I got some scrap wood at Home Depot for $0.50, and covered one side in bead board wall paper. 


And painted it the same chocolate color as our cabinets


I attached (and by I, of course I mean Jarrod) moulding around the sides and put the hooks where the chains could attach


(I didn't paint the inside, because no one will see it)

I painted the trim, and then hung it by chain from the hooks we put in the ceiling:


And Ta Da!!  I put rested some of the candles on scraps of leftover trim to stagger the heights of the glasses (there are only two different sizes here)


Total Cost: $32.50
Cups: $12 (1.92 for a 4 pack at WalMart)
Contact Paper $6
Scrap wood $0.50
Trim - $7
Hardware (chain and hooks) $7

DON'T FORGET ABOUT MY PAINT COLOR PARTY AND AMAZING GIVEAWAY!!! 
I hope to see you all back here on Friday the 22nd to share all of your favorite paint colors.


<center><a href="http://frugalhomeideas.blogspot.com"><https://blogger.googleusercontent.com/img/b/R29vZ2xl/AVvXsEjQFVacW67pGrOrhcdwQH1zBHkMUFLVNOUhrDBcg96k31a_g3MbUVAbEMjOH5JNATPMC69p4xI-sAkiNrCHerdaq_pMxkA3CO6QvBdIV7uF6JCW6I7ABOppxUJyMlzU5eUYfiOX5mk7frPE/s400/small+button.jpg"/></a></center><br><br>

Go see all the other great projects over at Kimba's!!
ASPTL


Sunday, January 17, 2010

Crap to Fab Lamp


I had a $10 Walmart crappy flimsy floor lamp.  I hated it.  My husband needed the light.  I needed to make it prettier.

So, I took this lamp:


This tube that came from a bolt of fabric that I bought:


And this table runner:


And made this:


The metal pole was so skinny, and I was adding a lot of "beef" to the top of the lamp, so I need to bulk up the bottom.  I spray painted the fabric bolt and the base of the lamp so it would all match.

The fabric was a little too short, so I added a little bit of a paper towl roll, and used painters tape to hold them together:


Classy, I know.  Hey, it could have been a toilet paper roll!

I had a drum shade from a lamp that has been in a closet, so I stole it, stripped it and used it to make the shape of the lamp shade


I just cut the table runner down, and then glued the two ends together after wrapping it around the naked shade.

Total cost to me: FREE
Total cost if I didn't have all this stuff laying around: $14
Lamp $10
Table runner $4 (from Ross)

Before:


After


I'm linking this up to:

Twice Remembered
It's so Very Cheri
The Shades of Pink
Thrifty Decor Chick, Before and after party

Wednesday, January 6, 2010

Another No Sew Roman Shade

I've been posting the play by play of our last "flip" house from two years ago, but I'm going to interrupt it to play blog party!


Shanty 2 Chic is having a "I made it without my hubby" party, and I just finished this last night.

I made  one of these for my little boy's room (you can get the full tutorial here), and it was so easy I wanted to do the same for my kitchen.

This literally took me less than a hour to make with leftover fabric (from these other no sew window treatments) and the existing mini blinds.  Fast and Free, and with my hubby!


Before: (pardon the mess on the counter)


After:


Kitchen and bamboo floors

Originally posted January 3rd, 2007:


We got bamboo floors for the living and formal dining area. We got it because it was the least expensive option... but I really like them. They look really neat, they are really thick and substantial, and the pieces just slide right together. People are more eco-friendly these days, so bamboo will be a good selling feature since it's renewable.


The kitchen is getting closer. It seems like no matter how much progress is made, we are still about 10 steps away from the final product. It's starting to look about 30 years younger though.


We have completed:
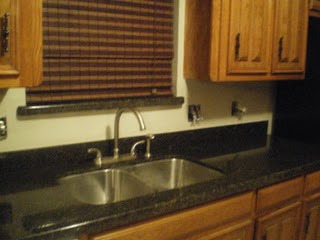
countertops
tile
most of the paint
put up window treatments
Replaced stove, double oven and fridge

We still have to:
finish up painting
replace outlet covers
get a few more window treatments
Get a new dishwasher
finish installing hardware on cabinets
put in new baseboards
replace the light fixtures
replace door into the laundry room and pantry
cover damaged part of cabinet from the old backsplash
Replace window sill by the fridge
Remove old stove top, and connect new stove top

Kitchen before:


Kitchen getting closer


Breakfast room before:


Breakfast room getting closer:


can you find the tuba player in this picture below?


Tuesday, January 5, 2010

Demo and Reno

This post was originally written on December 26, 2007:

Ripping down wall paper, and destroying the countertop. We were lucky that the wallpaper came off really easily. It was actually pretty fun!


Here's Jarrod prying off the old laminate countertop:


Things are really moving at the house! We've owned it less than a week, and we already have all of the granite and tile finished.


(this will look a lot better once we get the paint on there, and the new appliances, and the new hardware)


We got a STEAL on this tile. It's 18x18, and we were able to get about half of what we needed for $.50 a piece instead for $4.15 a piece. We got hundreds of dollars of tile for $35!!! I really love the way the big tiles laid on the diagonal came out. The kitchen is galley and not that large, but the large tiles really open up the space, and make it feel larger.


Yikes! Under construction. It's hard to see and end in sight with toilets in random places.


Jarrod and Phoebe being silly. We have the granite, sink, floor, and faucet done in both bathrooms, all we need now is the mirror, paint, hardware and light fixture

Sunday, January 3, 2010

80s house revamp

Our first home flip was a tiny little 800 square foot condo that was less expensive than most people's cars!  From there we went onto a real house (my first love - the one that got away), my adorable little 1916 craftsman bungalow

After we sold that one, we transported ourselves ahead 70 years and landed in the 80s.

I did a terrible job of documenting the first two flips, but for this next home I started a blog.  This was way before I knew that there were other crazy people just like me out there who love DIY. 

For the next however long it takes, I'm going to repost from my other (personal) blog the process from beginning to end of that 80s home flip.  Keep in mind that this was VERY VERY low budget.  No budget for accessories - I had to work with what I had and try to stretch my limited budget super far.  Also, this was before I was introduced to the wonderful world of design blogging, and I can say that I have grown so much in my ability to design a space.  I am on the verge of being embarassed about the final product on some of these... rooms, but we all started somewhere, right?

Here is the first post, dated December 26, 2007:

Third Time Around

This one has been a long time coming! We took the profit from the last house that we did and decided that I should quit my job. We have been working hard to build our apartment locating business. We have been in the apartment for nine months now... and it's been SO hard to rent again. It gave us a great opportunity to make sure that we could produce an income with apartment locating... but Jarrod and I were both really really itching to do another project.


After looking for MONTHS we found our current flip. We've owned it for 6 days now. We had the sellers fix the foundation for us, as well as provide us with closing costs. We are planning install hardwood (bamboo floors) in the living and dining, new tile in the wet areas, granite in the kitchen and baths, crown in the living, new fence in the back yard, all new fixtures, and all the little things that pop up as you're going.

We are hoping to have this home on the market by February 1st.

Here is the plan:


Here we'll straighten out the conrete walkway, replace all the trim on the outside of the house, paint the trim and the shutters an offwhite color.


We are replacing floors, countertops, appliances, light fixtures. We're taking down wall paper, retexturing and painting the paneling and walls.


There is some termite damage on the window sill, so we'll replace that


We are putting in bamboo floors in here, as well as putting in a new mantle. We are painting the paneling, putting in new light fixtures, and putting up some crown moulding.


We are replacing the floors, counters, sinks, and faucets in here. We'll replace the mirror and light fixtures, and pretty it up!


Master bedroom just needs a fresh coat of paint, new window treatments.... and decorate it :-)


Related Posts Plugin for WordPress, Blogger...